
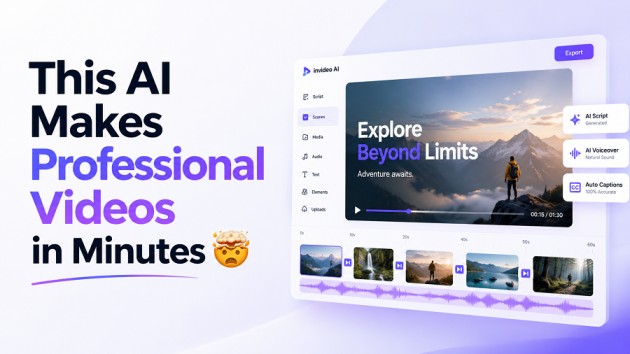
A complete, step-by-step guide for creators, marketers, and educators—covering every feature, workflow, pricing plan, and the latest model upgrades.
Table of Contents
- What is InVideo AI?
- Core features breakdown
- Step-by-step workflow
- Templates and formats
- Team collaboration tools
- Audio and subtitle capabilities
- Pricing and plans (2026)
- 2026 model updates
- FAQ
1. What is InVideo AI?
InVideo AI turns a prompt, URL, or bullet list into a good video — complete with voiceover, subtitles, stock media, transitions, and music — in minutes.
It sits squarely in the “script-to-video” category, but what separates it from competitors is the depth of customization after generation: every scene, voice line, caption, and transition is editable without rebuilding from scratch.
Whether you’re a solo creator batch-producing YouTube Shorts or a marketing team shipping localized ad variants across 10 markets, InVideo AI’s workflow is built to shorten the gap between idea and final export.
Honestly, the first time I tried it, I didn’t believe it would work that well. But watching a simple bullet list turn into a complete, voiced video in under 8 minutes was pretty shocking.
2. Core Features Breakdown
Here’s what you actually get inside the editor:
Automated script generation: Generates structured scripts from a prompt or URL with tone controls—professional, casual, or persuasive. The editor shows per-line durations and recommended visuals so you can match text to timing without guesswork.
Dynamic scene selection: AI suggests layouts, stock clips, music, and transitions per script segment. Accept recommendations wholesale or replace specific assets using filters for aspect ratio, color tone, and license type.
AI voiceover suite: Multiple neural voices with adjustable speed, pitch, and breathing patterns. Upload your own voice recording and use AI-assisted cleanup to blend it with synthetic voices.
The tone setting is actually really useful. “Casual” doesn’t just change a few words — it rewrites whole sentences to sound more relaxed.
Auto subtitles transcribe and time-align captions automatically. Edit inline, then export as SRT, VTT, or burned-in open captions.
Direct social publishing: Publish to YouTube, TikTok, Instagram, LinkedIn, and Facebook via OAuth — no manual downloads or credential entry each time.
Team collaboration, role-based access, frame-pinned comments, version comparison, and multi-stage approval gates for agency and in-house workflows.
3. Step-by-Step Workflow: Creating a Video from Scratch
Follow these steps in order to go from idea to export efficiently.
Step 1 — Set up a new project. Click “Create,” choose your format (16:9 for YouTube, 9:16 for Reels/Shorts, 1:1 for social posts), name the project, set resolution and frame rate, and select a template or start blank. Set your project language and default voiceover accent before adding scenes.
Step 2 — Generate or paste your script. Enter a short prompt or drop in a URL. The AI structures an intro, key points, and a call to action. Edit line by line in the script editor—durations and visual suggestions update in real time. Use “expand” or “condense” controls to hit a target runtime.
Step 3 — Import and organize media assets. Drag in your files (MP4, MOV, JPG/PNG, MP3/WAV) or connect to Google Drive or Dropbox. Organize into folders: Footage, B-roll, Voiceovers, Music, and Graphics. Use the built-in stock library to fill gaps—filter by duration, orientation, and license.
Step 4 — Edit with AI tools. Use the chat/AI editor to give natural language instructions: “Shorten scene 2 to 6 seconds, add a lower third with the product name, and swap the background to blue.” Apply pacing controls (Calm / Neutral / Energetic) and AI color grading, then fine-tune manually for brand consistency.
This is honestly where InVideo AI is worth the money. It feels like texting someone who edits videos for me — not clicking through a complicated menu.
Step 5 — Review captions and voiceover. Enable auto-captioning, adjust line breaks in the subtitle editor, and preview the TTS voiceover. Replace with a human recording on any scene where nuance matters. Use the confidence score to find low-quality transcription lines and correct them manually.
Step 6—Export and publish: Choose an export preset (YouTube HD, TikTok vertical, enterprise watermark-free), render a short draft to verify timing and audio levels, then publish directly to connected social accounts or download the file.
Pro tip: Save your project settings as a preset after Step 1. This lets you start future videos without re-entering format, resolution, language, and brand kit details every time.
4. Templates and Supported Video Formats
InVideo AI supports all three major aspect ratios and lets you switch between them without reworking your entire timeline.
Aspect ratio options
| Format | Ratio | Best for | Resolutions |
| Landscape | 16:9 | YouTube, presentations | 720p, 1080p, 4K |
| Vertical | 9:16 | TikTok, Reels, Shorts | 720p, 1080p |
| Square | 1:1 | Instagram Feed, LinkedIn | 720p, 1080p |
Template categories: Templates are organized by use case—promotional (bold titles and CTAs), tutorial (step sequences and on-screen annotations), social (rapid cuts and vertical framing), explainer, and product demo. Filter by length, style (minimal, cinematic, corporate), and included assets.
Brand kit integration: Upload logos, HEX color palettes, OTF/TTF fonts, and preset intros once. InVideo applies them automatically across every template and enforces brand-safe text sizes and contrast ratios. Create separate brand profiles for different clients and toggle between them per project.
Watch out: After switching aspect ratios, always preview each scene—some stock clips may need to be reframed manually when moving from 16:9 to 9:16.
From my experience, the tall 9:16 templates look the most polished right away. The wide 16:9 ones sometimes need a bit more fixing to look really good.
5. Team Collaboration Tools
InVideo’s multi-user setup is built for agency and in-house workflows, not just individual creators.
Role-based access: Assign team members as owner, admin, editor, or viewer. Roles control who can create projects, change brand templates, publish videos, or access shared asset libraries — preventing accidental overwrites when multiple contributors work in parallel.
Frame-pinned comments: Feedback gets pinned to exact frames or clips, not a separate document or email thread. Tag teammates, set review status (needs changes / approved), attach timestamps, and close threads automatically when the associated clip is updated.
This one feature alone has saved me from so many confusing email chains. Instead of “fix the beginning,” someone can just click the exact moment and say what’s wrong.
Version comparison and approval gates: Compare current and prior exports with reviewer comments layered on top. Configure approval gates requiring one or multiple sign-offs before publishing. Combined with export history, this eliminates “which version is final?” confusion on large teams.
7. Pricing and Plans (2026)
InVideo AI uses a credit-based model layered on top of a subscription tier. Estimate your monthly output before choosing—AI credits are the key variable.
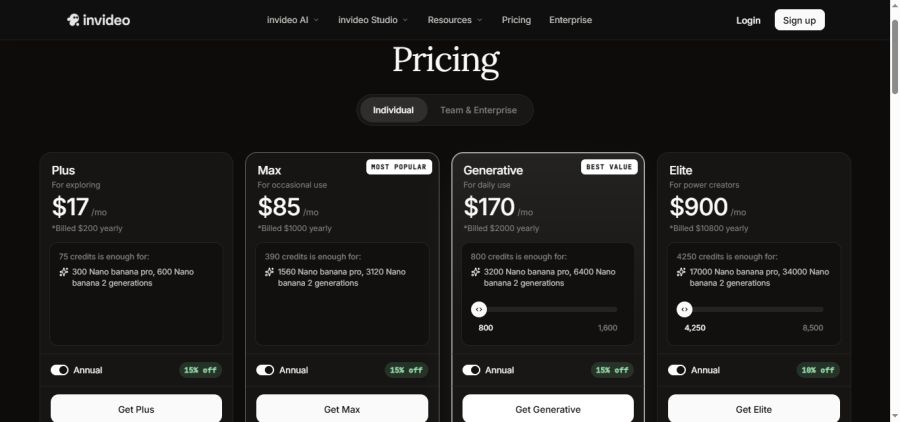
My honest opinion: the Plus plan is the best deal for most people making videos on their own. The free version will annoy you with the watermark pretty quickly.
Important warning: Some features use up “AI credits” faster than others — like generating longer videos or using special AI styles. If you make a lot of videos, you might run out of credits before the month ends. Check your usage before picking a plan.
Which plan should you pick?
- Just testing it out → Free
- Solo creator, regular uploads → Plus
- Business use, 4K needed → Max
- Agency or team with advanced needs → Generative or Elite
8. Frequently Asked Questions
Can I use InVideo AI videos for commercial purposes?
Yes, on Max and Generative plans. Always check the license type on individual stock clips and AI voices before publishing to paid campaigns — some assets are editorial-only.
Does InVideo AI support my language?
The platform supports script generation, TTS voiceover, and subtitle generation in multiple languages. The 2026 Neural Voice Suite added multilingual prosody control for more natural-sounding non-English narration.
Can I upload my own footage and voice recordings?
Yes. InVideo accepts MP4, MOV, JPG/PNG, MP3, and WAV files. You can upload your own voice recording and use AI-assisted cleanup to blend it with synthetic voices.
How does InVideo AI compare to Synthesia or Descript?
InVideo AI focuses on script-to-video automation driven by stock media at scale. Synthesia excels at avatar-based presentations; Descript is stronger for podcast-style editing and transcript-based cuts. InVideo’s strength is high-volume social content production with brand kit enforcement across multiple channels